
Device and connection guide
How to change your DNS.
Use these illustrated instructions when a website name does not resolve correctly or when you prefer a trusted public DNS resolver. Choose your device below; no AB33 account details are required.
Before you begin
Before you begin
- Take a screenshot or write down the current DNS settings so you can restore them.
- Keep the device connected to the internet while making the change.
- Menu names can vary slightly by device maker and operating-system version.
Android 9 and later
Android
Private DNS applies across Wi-Fi and mobile data on supported Android devices.
Settings → Network & internet → Private DNS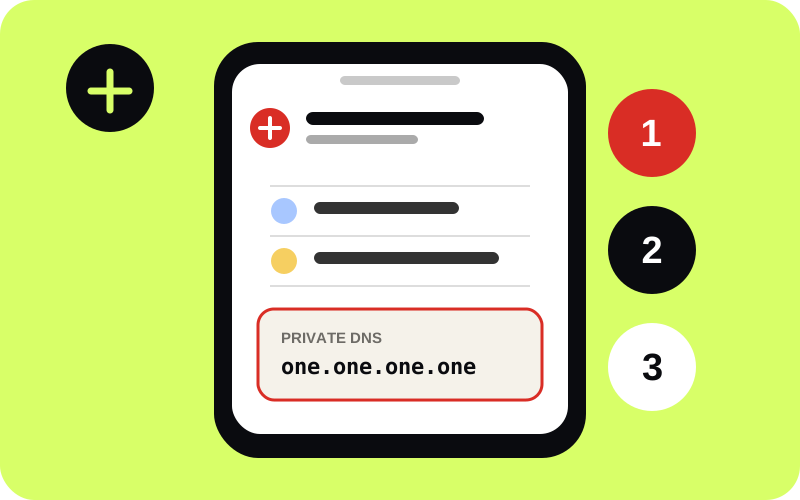
View setup steps
- 01
Open Settings
Open Settings and tap Network & internet. On Samsung phones, use Connections → More connection settings.
- 02
Find Private DNS
Tap Private DNS. If it is not visible, search Settings for “Private DNS”.
- 03
Choose a provider
Select Private DNS provider hostname. Do not enter a numeric IP address in this field.
- 04
Enter the hostname
Type one.one.one.one exactly, with no spaces or https:// prefix.
- 05
Save and test
Tap Save. Turn Wi-Fi off and on once, then open a familiar website.
Note: If the phone cannot connect, check the spelling first. To undo the change, return to Private DNS and choose Automatic.
Current iOS and iPadOS
iPhone / iPad
Manual iOS DNS settings apply only to the Wi-Fi network you edit, not to cellular data.
Settings → Wi-Fi → ⓘ → Configure DNS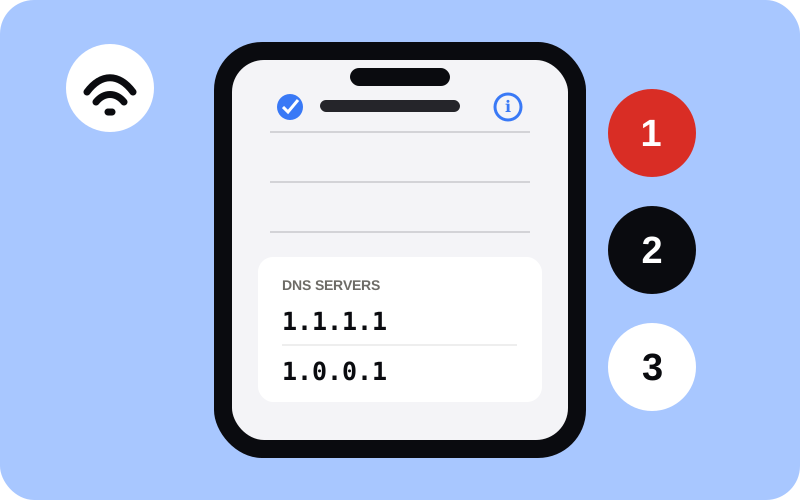
View setup steps
- 01
Open Wi-Fi details
Open Settings → Wi-Fi, then tap the information button ⓘ beside the connected network.
- 02
Open DNS settings
Scroll down and tap Configure DNS.
- 03
Switch to Manual
Select Manual. Record any existing server addresses before replacing them.
- 04
Add both servers
Tap Add Server and enter 1.1.1.1. Add another server and enter 1.0.0.1.
- 05
Save and test
Tap Save. Reconnect to Wi-Fi if needed, then open a familiar website.
Note: Repeat these steps for each Wi-Fi network. Manual iOS settings do not change cellular DNS; a trusted DNS app or configuration profile is required for that.
Windows 11
Windows PC
Change the DNS server assignment for the Wi-Fi or Ethernet adapter currently in use.
Settings → Network & internet → Wi-Fi or Ethernet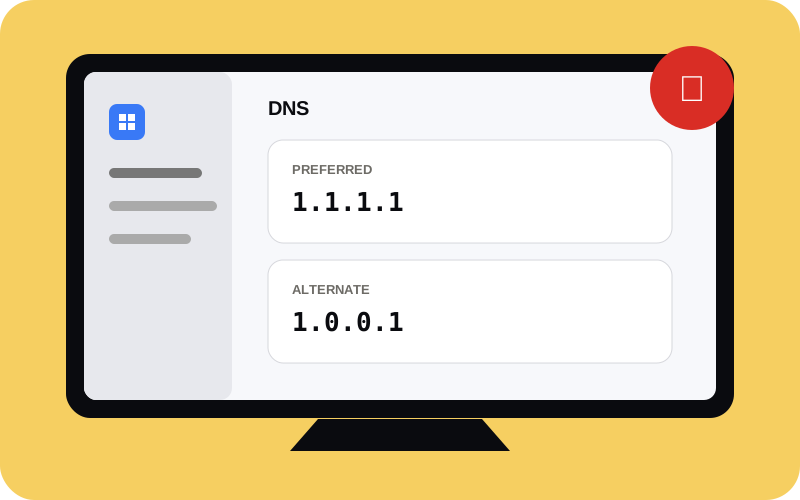
View setup steps
- 01
Choose the active adapter
Open Start → Settings → Network & internet, then select your Wi-Fi or Ethernet connection.
- 02
Edit DNS assignment
Find DNS server assignment and select Edit.
- 03
Enable manual IPv4
Change Automatic (DHCP) to Manual, then turn IPv4 on.
- 04
Enter both addresses
Set Preferred DNS to 1.1.1.1 and Alternate DNS to 1.0.0.1. If offered, choose DNS over HTTPS (automatic template).
- 05
Save and test
Select Save, reopen your browser, then test a familiar website.
Note: On Windows 10, use Network Connections → adapter Properties → Internet Protocol Version 4 (TCP/IPv4) → Properties. To undo the change, restore automatic DNS (DHCP).
1.1.1.1
Check that it worked
Open Cloudflare’s connection test. The resolver section should show that 1.1.1.1 is connected. If pages stop loading, restore Automatic DNS and reconnect.
Test your connection ↗What changing DNS does—and does not do
- DNS translates website names into network addresses; changing it can fix some name-resolution problems.
- DNS is not a VPN and does not hide all browsing traffic, change your location, or guarantee access to a website.
- Work, school, hotel, parental-control, and managed networks may block custom DNS. Follow the network owner’s rules.
- Only enter DNS values from a provider you trust. Never install an unknown profile or app from a message or pop-up.
Still having trouble?
Still having trouble?
Restore Automatic DNS first. If only an AB33 page is affected, check the official domain directory or contact official support.